Showing posts with label Beauty. Show all posts

Wednesday, November 21, 2012

Product Review - It's a 10!

Oh Hair. You fickle thing. I've discussed my complicated hair ad nauseum on my blog, but to sum it up for anyone who hasn't heard it before...my hair is naturally curly, thick, coarse and FRIZZY. Once I started to really care what my hair looked like (my teen years), the hunt for perfect products began. Super moisturizing shampoos and conditioners. Deep conditioning treatments. Serums and mousses and balms. You name it, I've tried it.

For the longest time, I would wash, condition and deep condition in the shower, then use a anti-frizz serum AND a mousse and/or leave-in balm.

So. Many. Steps. 

I thought it did a pretty decent job...but it was a lot of products (and money). Then several of my friends starting talking about this spray-in treatment called It's a 10. Miracle Leave-in Plus Keratin to be exact. I did some of my own research and decided to pick up a trail size bottle at Ulta.


The "miracle" part of the description was no lie. I could feel a difference in my hair after just the first use! About a week in, I stopped using my anti-frizz serum and balm altogether.

I didn't need it anymore.

My hair was getting softer, more shiny and most importantly, SO MUCH LESS FRIZZY. Fixing my hair is far more enjoyable, too. It blow dries smoother so I don't have to flat iron each section twice like I used to. And it stays smooth basically all the time once it's fixed. That is a whole new world for me! I used to carry a smoothing balm in my purse and I'd apply it several times a day. No more of that! My hair just looks and feels so much healthier.

See the difference for yourself...

Below is a picture I used in my post about the Dove Evolution campaign. Long before the wonder that is It's a 10. Post blow dry used to equal poof and frizz:

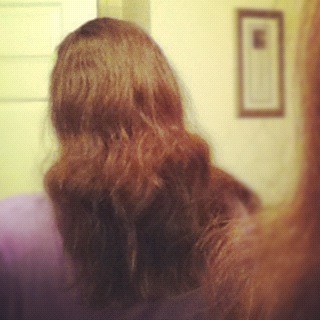
 Now, it's almost smooth enough to wear as is after just blow drying!

I mean, is it obvious yet that I am IN LOVE with this product? In case it's not, let me try it this way. THANK YOU It's a 10! I love you!

Try it! You won't be disappointed.

*Disclaimer: I am not being paid or compensated by It's a 10 or Ulta in any way. This is simply an opinion from my personal experience.

Friday, November 16, 2012

Product Review - Ardell Lash Excel

I don't like making broad generalizations, usually, but there is one that I stand by 100%.

Women love when their eyelashes look amazing.

No seriously. We do. Have you seen the insane amount of mascara available to us? It's because we are all about our lashes. Nothing else we put on our eyes looks as good without it. And I say "we" because I am no different. I own a ridiculous amount of mascara for one person. But its because I'm constantly trying to find that one magic tube of black goo that will make my eyelashes PERFECT.

I have pretty average lashes. They aren't super long or super short. They aren't very dark on their own. And they are a very moderate thickness. I also have one eye of lashes that behaves (right) and one side that sticks straight out and does NOT like to curl (left). Like I said. Average. 

For a long time I have thought about lash enhancing options. But they are expensive. All the lash serums I had heard about cost $50 or more for a tube. Out of the question. There are also lash extensions. I have friends that swear by them, but they are also expensive and just like fake nails or hair color, you have to maintain them. No thanks.

Well, finally there is another, less expensive, option. I'm talking $15.

Ardell Lash & Brow Excel

After lots of research and reading online reviews, I decided to take the plunge. I dropped into Sally's Beauty Supply and picked up a tube. It's been about a month and a half since I started using it, and I'm starting to see a difference! 
After picture taken 11/9/12
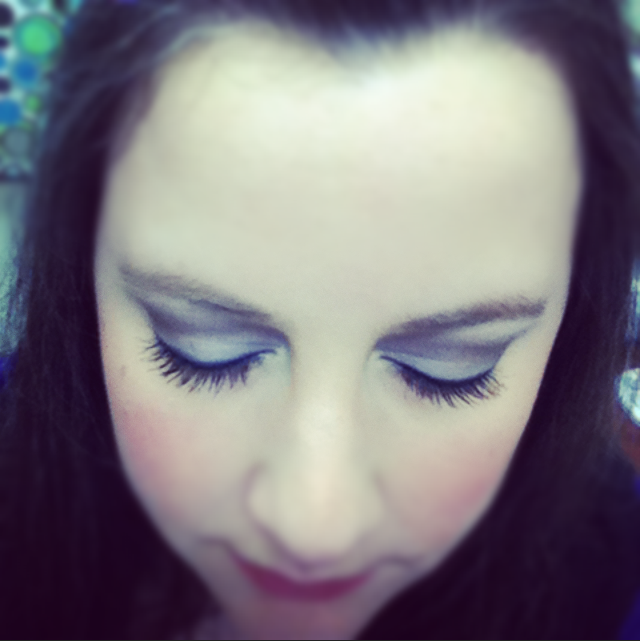
I should have taken a before picture on the first day, with only mascara on...but I just didn't think about it until I started thinking to myself, "My lashes seem longer". So, I dug up a picture of a make-up look I'd tried to use as a comparison.They totally look longer, right? The most interesting thing is that I am sprouting NEW lashes. There are about a dozen little short lashes on each eye...so I am eager to see what those little guys do as they grow.

At first, I really just noticed length, but I'm starting to see a little increase in thickness also, maybe because of the seemingly new growth. One of my bffs was looking at me the other day and I looked down at something and she said, "WOW! Your lashes basically just touched your cheekbones!" Of course she was kidding, but they ARE longer.

Overhead view
They are starting to touch my eye brows when I look up
Now listen, I have no doubt that if I would cough up the money for one of the more expensive brands, I'd be seeing crazy results...but I've been pretty happy with the changes I am seeing so far. And for considerably less money? That's a WIN in my book.

Want to know a sad fact? When I was telling Ryan about this product and that I was starting to notice a difference, he said, "I don't think I've ever really noticed your eyelashes."

Dead stare.

I mostly blame that on him being a dude who has never, in his life, thought about his own (thick, long, dark) lashes. But he constantly compliments my eyes. Its actually a running joke. And when I do anything that further enhances my eyes, he notices. I just don't think he has given eyelashes, as a separate entity, much thought. Well, when these puppies are long enough to braid, I bet he'll take notice. ;)


*Disclaimer: I am not being paid or compensated by Ardell or Sally's in any way. This is simply an opinion from my personal experience.

Monday, September 3, 2012

Product Review - Neutrogena Tinted Moisturizer

Since my mid-twenties or so, I've felt like I was constantly battling with my face. I was really lucky and had great skin in my teens. I would get a few monstrous pimples a few times a year, but other than that, my skin was clear, soft, not too oily, not too dry. But, around 24-25, something changed. New types of stress, "aging" or hormones perhaps? Whatever the cause, it threw me for a loop. In the past year, I have noticed even more changes. Many of you will roll your eyes at me, but I'm starting to notice fine lines on my forehead and around my eyes. They don't ruin my day or anything, but I don't exactly love them either. Add in this new break-out prone skin with serious dryness and I feel like I've switched skin with a stranger.

When I switched to the Neutrogena Naturals line for my cleanser and exfoliater, I noticed a slight drop in break-outs. Don't misunderstand - they still happen more often than I'd like, but they are slightly less frequent.

But then I noticed my mineral makeup was accentuating the fine lines and worsening the dryness.

I decided that I needed some extra moisture to help combat the dryness, but with my fair skin, going with no coverage on my face at all doesn't really work for me. My pink undertones and pale complexion isn't ideal on its own. So, I made the decision to try a tinted moisturizer. Enter another stellar Neutrogena product - Neutrogena Healthy Skin Enhancer.

 Enhance indeed. 

This is a light, creamy tinted moisturizer with SPF and Retinol mixed right in. This combined so many things into one! It took a product I already used (moisturizer with SPF), added in Retinol (shown to diminish fine lines AND help fight break-outs) and a dash of sheer color. And I just love it. It provides just enough coverage to even out my skin tone while leaving my skin softer than its been in YEARS. And I have truly noticed the fine lines (especially on my forehead) becoming just a little less visible. I will admit that my nose and chin tend to get a bit shiny, so I just dust a tiny bit of translucent powder on them and problem solved.I don't see myself going back to "regular" make-up for my face anytime soon.

*Disclaimer: I am not being paid or sponsored by Neutrogena in any way. This is simply an opinion from my personal experience. 

Saturday, September 1, 2012

Hair Fail

So, if you follow me on Instagram you get bombarded with a nauseating number of beauty-related pictures. As I've discussed approximately a million times, I love trying new things with my hair, nails, makeup, etc, and IG is my outlet for that.

Well, recently I saw a tutorial on one of my favorite blogs, The Beauty Department, and it got me all excited.

Let me back up.

I have naturally thick, coarse, curly, big hair. Some of you think that sounds awesome. Sometimes it is. Usually, it isn't. I prefer to wear my hair straightened because I can get more "wear" between shampooings. And when you have coarse, naturally curly hair, the less you wash it, the better condition your hair is in.

Back to the point. This tutorial was all about extending the life of your blow out. I generally can't wear my hair only blown out without using my Chi to smooth and seal the frizz, but I decided to give it a whirl.

I spend about twice as much time as usual blowing out my hair until it was basically as smooth as I could possibly manage without my trusty Chi. Then I twisted each side into rope braids, as directed, and went to bed.
Proof it was before bed - no makeup, tired eyes.
The next morning, I was eager to see what the result was. I was convinced it was going to be gorgeous. I unraveled the rope braid and ran my fingers through my hair.

Um, no. The Beauty Department lied. Or they cheated. Maybe both. Because the result, was NOT pretty.

Still no makeup, but looking slight more rested? Maybe?
It didn't look so awful from the front, you can judge for yourself above, except it was pretty frizzy. But the back...it was a freaking Roman tragedy.


I kind of can't believe I am even putting this on the internet for the world to see...ew. It basically looked like I slept with my hair in a ponytail and had the WORST pony tail indentations ever. I immediately plugged in my Chi and went to town fixing this mess.

So, here is my thought. This would probably work on someone with longer, naturally straighter and smoother hair. (coughKIMcough) But, it was a giant hair FAIL for me.


Monday, March 5, 2012

Saving Face

I love a fresh, clean face. I love the way my skin feels after I cleansed, exfoliated and moisturized. I love washing the day away and seeing the colors from my make-up circle the drain. After my post about my new favorite facial cleanser and exfoliant, I had a few ladies reach out and ask what the rest of my "routine" consisted of.
"Fresh faced" after my nightly cleansing routine. Yes, I am putting yet another picture of myself on the internet with no make-up. My darling husband lovingly gets onto me for being too hard on myself...so this is me, trying to be better to myself. I have on NO makeup, and I don't hate this picture. What a revelation!
First and foremost, I try not to NOT sleep in my make-up...but I totally do like once a week. Not on purpose, but it happens. (Just being honest.) But for the OTHER nights of the week it goes a little somethings like this:
Cleanse - Neutrogena Naturals removes my make-up and cleanses away a day's worth of dirt without being too harsh for my super sensitive skin. It's super silky.

Exfoliate - Neutrogena Naturals Pore Scrub is SO gentle, but does a great job scrubbing away the dead skin.

Treat - Breakouts happen... more often than I'd like to admit these days. Proactiv Advanced Blemish Treatment is the only Proactiv product I can use...and it's also the best blemish treatment I've ever used. You can't buy it separately, so I don't know what I'll do when I run out!

Moisturize - This is where it gets a bit more complicated. I have 3 different moisturizers that I use (not all at once) from Clinique. I LOVE Clinique and have used their products for as long as I've been wearing make-up. Plus, they are cruelty free! YAY! In the spring/summer, I use Dramatically Different lotion because it is light enough to keep me from looking too...greasy. I have recently added Youth Surge with SPF 15 into my morning routine. I haven't been using it very long, but should I decide I don't love it, I'll let you know. In the fall/winter I use Super Rescue antioxidant night moisturizer (at night, obviously) and Dramatically Different in the mornings.

Prevent - Repairwear intensive eye cream. Dark circles and "bags" under the eyes are hereditary for me, and while I have no qualms with getting older, my biggest issue is how dry the skin around my eyes get. Repairwear helps keep my under-eye "baggage" check and leaves the skin around my eyes feeling SO soft and smooth.


I realize that was a lot of products thrown out there at once, but that's the reality of my routine. :) Do you have products you can't live without?

Thursday, January 19, 2012

Newsprint Nails


A week or so ago, I tried yet another YouTube idea. Newsprint nails. I was obsessed with the look and thought I’d give it a whirl.

I gathered my supplies:
Light grey polish (I used OPI Moon Over Mumbai)
Top Coat (I used Essie Matte About You)
Rubbing alcohol
Newsprint

Now, I didn’t have a newspaper handy and wasn’t going to buy one just for this purpose, so I opted for an old paperback book. I know, I know - tearing pages out of a book is blasphemy, but I chose one that I will probably never read again.

I painted my nails with the usually two coats of polish, then waiting for them to dry completely. Once they were dried, I soaked each finger (one at a time) in the alcohol for about 20 seconds, then pressed the printed page firmly onto my nail and held it in place for another 10-15 seconds. When I released – viola! Newsprint nails! Once I was done with all 10 fingers and the alcohol has evaporated from each fully, I applied a good amount of top coat. 


The process was really, really easy and I LOVED the look but…I found that my nails were chipping within a day. The color I chose is one of my longest lasting polishes, so this surprised me. I have to wonder if soaking my nails in the alcohol messed with the integrity of the polish somehow. I read another version where they put the newsprint on the nail first, then held a cotton ball soaked in rubbing alcohol on top, similar to a temporary tattoo. I might try it that was next time and see if the results are any better!

Sunday, January 15, 2012

Inspired: Dove Evolution

The video has been around for awhile. You know the one. A time lapse video of a model being put through the ringer of blow drying, curling, makeup, styling...and then, Photoshop - all to achieve someone's "ideal" of beauty. I have a few friends who've done their own versions of this, both in video and pictures, and I've always meant to as well. But, usually when I think to do it, I'm half way through my routine.

Yesterday, I made a point to take the few extra minutes and photograph myself after each "step" of my process. See, this is more than just jumping on a bandwagon that has been around for years. This is important to me. Not only as a woman, but as a member of a society that is so (unfortunately) based on appearance. Without going off on a tangent here, I'll just say this. While I clearly go along with some of the very hype I am dissing, I have a real problem with how the media/society/our peers make us feel that we aren't "enough" if we chose NOT to straighten our hair, apply coats of make-up or wear the latest fashions. There are many, MANY days when I wish I'd never picked up that first tube of mascara. My Mom warned me. "Once you start, it will be hard to go back." Boy, was she right. I have now grown accustomed to seeing myself with my hair done a certain way and a full face of make-up.

Many woman will tell you "Woman don't dress up for men. They dress up for other woman." I HATE that mindset. As if it has to always be a competition. I've thought long and hard about why I feel the need to do it all. I actually think I go through all of the blow drying, the straightening, the curling and the make-up application for ME. Which is why I am okay doing it. It makes ME feel good. I've reached a point where I really don't care much about what other woman, or men, think. Now, I do care what my husband thinks because really nothing makes me feel more beautiful than when he gives me that certain "look", but more importantly I care how I feel. And I feel like the best version of me when I've put in the work.

I said I wasn't going to go on a tangent, didn't I? Oops. Let me get to the point. I think it's an important part of self-acceptance to embrace your "before" just as fully as your "after". So, here's mine, 100% unedited and raw.

Wet, naturally curly hair. Zero make-up.

Post-blow dry.

After flat ironing.

After curling.

And finally, after applying make-up.

Thank you, Dove, for inspiring me.

Sunday, January 8, 2012

Product Review - Batiste Dry Shampoo

I have naturally curly hair. And while I do wear it natural from time to time, I only get a day out of my hair when it's curly unless I wear it up because I have to put so much product in it to tame the frizz. (Longest run-on sentence ever.) So, I blow dry and flat iron my hair to straighten it most of the time.

I consider myself lucky. When it's straight, I can usually go 2-3 days without shampooing. I just don't get that "dirty" hair look for at least 48 hours. And thanks to dry shampoo, I can stretch it to 3 days. This means less heat damage and more time for my hair's natural oils to keep it healthy. But, dirty hair isn't pretty.

I have been using dry shampoo for a long time. In high school, I bought it in a little container that looked like loose face powder. I'd get a little bit on a kabuki brush and pat it into my roots. As the years went on, I tried different brands and applications - some better than others. The loose powder/kabuki brush method works just fine, but takes a longer. I really like the kind that "sprays" on. And after half a dozen brands, I think I've found "The One" (for me).

 Oh, Batiste. The miracles you work on my 3-day hair.

My number one complaint with dry shampoo is that it can look "chalky" on my dark brown hair. Well, Smarty Pants Batiste thought of a solution for that. The "Hint of Color" line. (Okay, I don't know if I can really call it "a line". It comes in two colors. Blonde and Brown.)

Here is why I love this product:
-It leaves absolutely NO chalky-white residue.
-It does a great job "absorbing" oil.
-It smells nice. (I've used some dry shampoo products that smell like chemicals. Gross.)
-It adds volume to my limp 3-day-hair roots.
-It's only $8.99.

Two thumbs up, Batiste! 

*Disclaimer: I am not being paid or sponsored by Batiste or Ulta in any way. This is simply an opinion from my personal experience.

Friday, January 6, 2012

Product Review - Neutrogena Naturals

I  am one of those people (read: girls) who is in constant search of "the best" beauty products. I spend far too much time and money at Ulta (though I try to ONLY shop when there is a coupon or sale). I read beauty blog after beauty blog. I watch YouTube videos galore. When I get a new product, I tend to tell people about it. And recently I had a handful of friends tell me that I should add "reviews" of the products I try to my blog. So, here it is. I realize this makes me sound vain and self-absorbed. I really don't think I am either of those things. I just like to "play beauty shop". And I am always looking for products to simplify my routine.

One product I am always on the market for is a great face wash and scrub. I have really sensitive skin so I have to be careful with what I use. Too many chemicals (see: Proactiv) and my skin freaks out. For about a year, I've been using a make-up remover, followed by a face wash and scrub all by Clinique. (Nothing against Clinique. I have been a loyal Clinique customer for a long, long time. They make a great product.) They've worked fine, but I felt like my skin was starting to look a bit dull and it always felt a bit "tight" until I applied my moisturizer. And I didn't like having to use a make-up remover first and THEN washing my face.

I started doing research and just didn't have anything jump out at me. Until, that is, I saw the commercial for Neutrogena's new Naturals line. I grabbed my Ulta coupon and headed to the store. I read the label and compared it to what I was using as well as other things on the shelf. Two major things caught my eye.

1 - I could read (and understand) most of the ingredients listed. I love the idea of using less chemicals on my face.


2 - They do no test on animals.


I decided on the Fresh Cleansing + Makeup Remover face wash (two in one - JACKPOT!) and the Purifying Pore Scrub.

I have been using these two products (the face wash daily and the pore scrub a few times a week) for about three weeks now and I love the stuff. The face wash leaves my skin feeling soft and clean. The pore scrub is gentle but effective. My skin looks healthier and has lost the "dull" look. And the best part? I spent less on both Neutrogena Naturals products than I did on ONE of the Clinique products. So, props to Neutrogena. I am a happy girl.

*Disclaimer: I am not being paid or sponsored by Neutrogena or Ulta in any way. This is simply an opinion from my personal experience.

Wednesday, November 2, 2011

Adventures in Beauty - Braids

I. Love. Braids.

I always have. If my hair was long enough to braid (it usually was, except for ages 7 & 8), chances are, I wanted a braid in it. My American Girl doll, Molly, came with braids...though I later took them out to practice OTHER braids on. For my 11th or 12th birthday, my cousin gave me a book of 50 braids and how to do them. I wore braids when braids weren't cool anymore. (Ask Ryan.)

So, how thrilled am I that they are now trendy and fashionable?! I get to pull out all my old braids from my arsenal and wear them with PRIDE! And I've learned some new ones too. Like this one...the "one sided" braid.

I saw this braid on Lauren Conrad's blog and tried it that very day. It is SO easy and SO cute. You'll see me rockin' this one often.

Tuesday, October 25, 2011

Adventures in Beauty - Marbled Nails

I love all things "beauty". Hair, make-up, nails - all of it. In my downtime, I have been known to read blogs, watch YouTube videos, and more recently stalk Pintrest, for hours looking at tips, tricks, techniques and ideas. I try a lot of them, and usually report to a handful of my friends on how it went. After many of them urged me to start blogging about it, I decided that would be a great way to get me blogging more often!

So...I give you - Adventures in Beauty!

This is my most recent (as in, yesterda) endeavor. I've always liked to have my nails done or painted. It makes me feel more feminine. And I have about 10 go-to colors that I alternated based on time of year. The problem? They were all a variation of red. Pink, reds, maroons...and one dark purple. They served their purpose, but as I scrolled through pictures on Pintrest, I found myself attracted to colors that were not in the red family. I found one post in particular that I knew I had to try. Nail marbling!

So, on Monday, I took my 20% off coupon to Ulta and I bought 4 new colors.

O.P.I. "French Quarter for Your Thoughts" (a lovely Greige, which is a mix of gray and beige) and Orly "Blue Collar" (almost a turquoise), "Lemonade" (obviously, yellow) and "Gumdrop" (seafoam green)

I was set and ready to tackle the daunting task. And I do mean daunting. This is a tedious, temperamental process. I'd tried it for fun once before, but with a couple of my shades of red, and it hadn't turned out great. But I was determined.

I got my little bowl of room temp water, my orange stick (or tooth pick), my lotion, a paper towel, some tissues and the colors. (Yeah, see, daunting.)

First, I painted my nails with the Greige color.

After it was good and dry, went one finger at a time. I applied a liberal amount of lotion, making sure to not rub it in all the way.


Now, I failed to take a picture of the next part because you have to move so fast...but I will explain it as best I can and link a helpful YouTube video below.


Next, you drop the colors into the water. I started with the greige, let is spread out, then dropped the almost turquoise on top, let that spread, dropped the yellow, let is spread, dropped the seafoam green, let it spread - and repeated the process. Once I had the number of layers I wanted (again, speed is key), I gently pulled my orange stick through the "oil spill" of nail polish until it was swirled to my liking. Then, I put my nail directly into it, waited a few seconds, used the orange stick to remove the color from around my finger, and pulled my finger out. Then, I simply wiped away the polish from my skin (thanks to the lotion, it came right off). I did have to clean up the close edges with nail polish remover (I snapped the picture before I'd done that).


It's far from perfect, but I love it anyway. Be patient with it...it's going to take some time...but the end result is so, so cool. And if you want to SEE it done, or if my directions confused you (very possible), check out this video tutorial. (She uses tape instead of lotion, but I found lotion much easier.)